

Rotation 3 – Player Positioning
The players have rotated one position clockwise around the court. Here is where they are in Rotation 3.
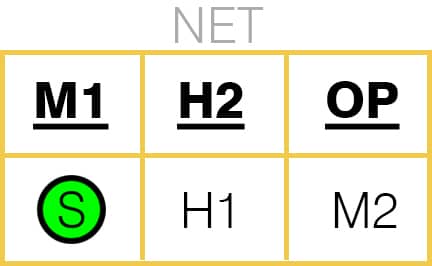
Bold & Underlined Text = Front Row Players
In Rotation 3, the M2 (replaced by the libero) is in Zone 1, followed by the Opposite, H2, M1, Setter, and H1. In Serve-Receive, there are a few options available.
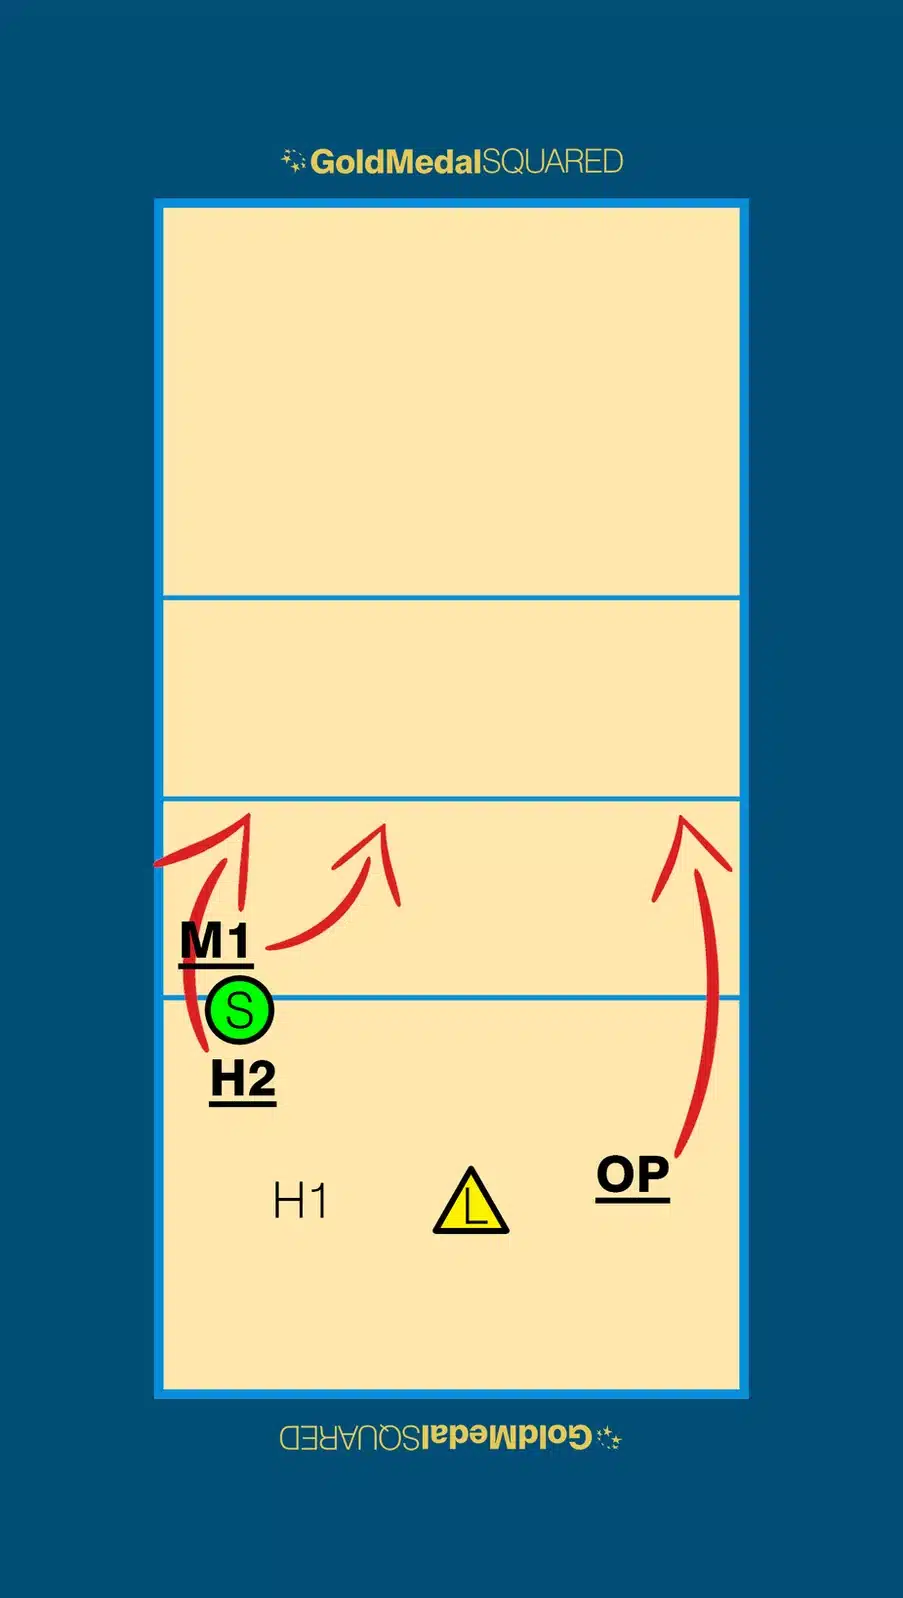
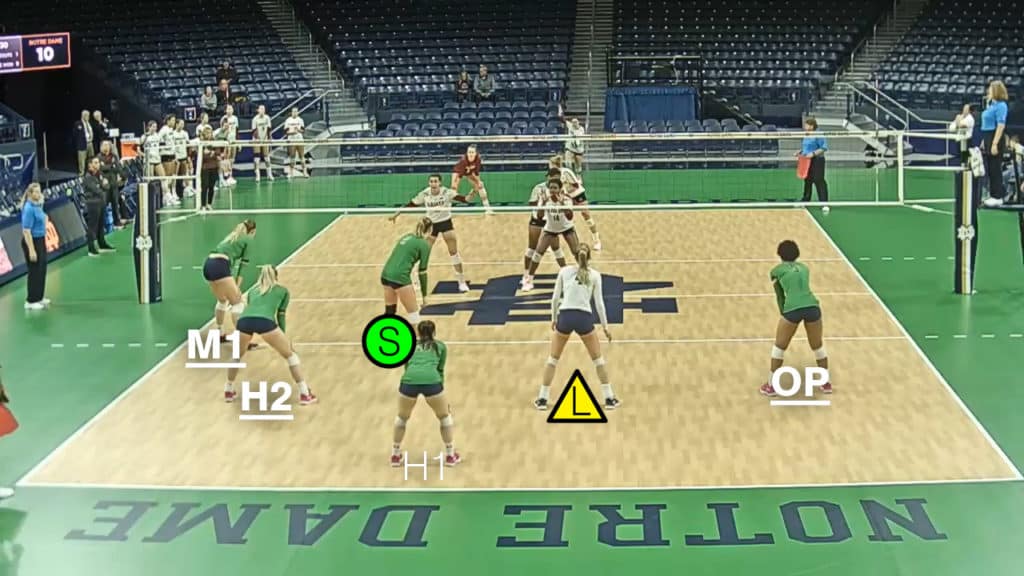
ROTATION 3 – Traditional Serve-Receive Option
Player Assignments by Position:
S: Starts in Zone 3/4 around the 3-meter line
H1: Passes in Zone 6
L: Passes in Zone 1
OP: Starts in Zone 2 and hits Reds
H2: Passes in Zone 5 and hits Gos
M1: Starts in Zone 4 and hits Gaps/Quicks
Advantages/Benefits:
- The Setter is allowed to start the rally pretty close to the passing zone.
- All three attackers will start the rally in natural and comfortable positions on the court.
Disadvantages/Drawbacks:
- The Setter needs to avoid distracting (or being in the way of) the two passers behind her. If this is a problem for the passers, the setter can simply move to the left as far as she needs to.
- If the Libero is the best passer on the team, it’s easy for opposing teams to not serve to her.

Important Overlap Rules Considerations:
- The passing H2 must be in front of the H1, even though they are both passing right next to each other.
- The Setter must be behind the M1.
- The Setter must be to the left of the H1.
- The M1 must be to the left of the H2. This won’t be a problem if the M1 stands right next to the left sideline when the rally begins.

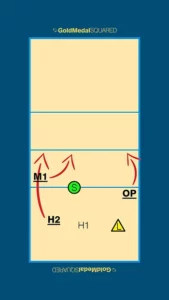
Rotation 3 with the H2 passing and hitting a go. The M1 hits a Gap/Quick. The Opposite hits a red.
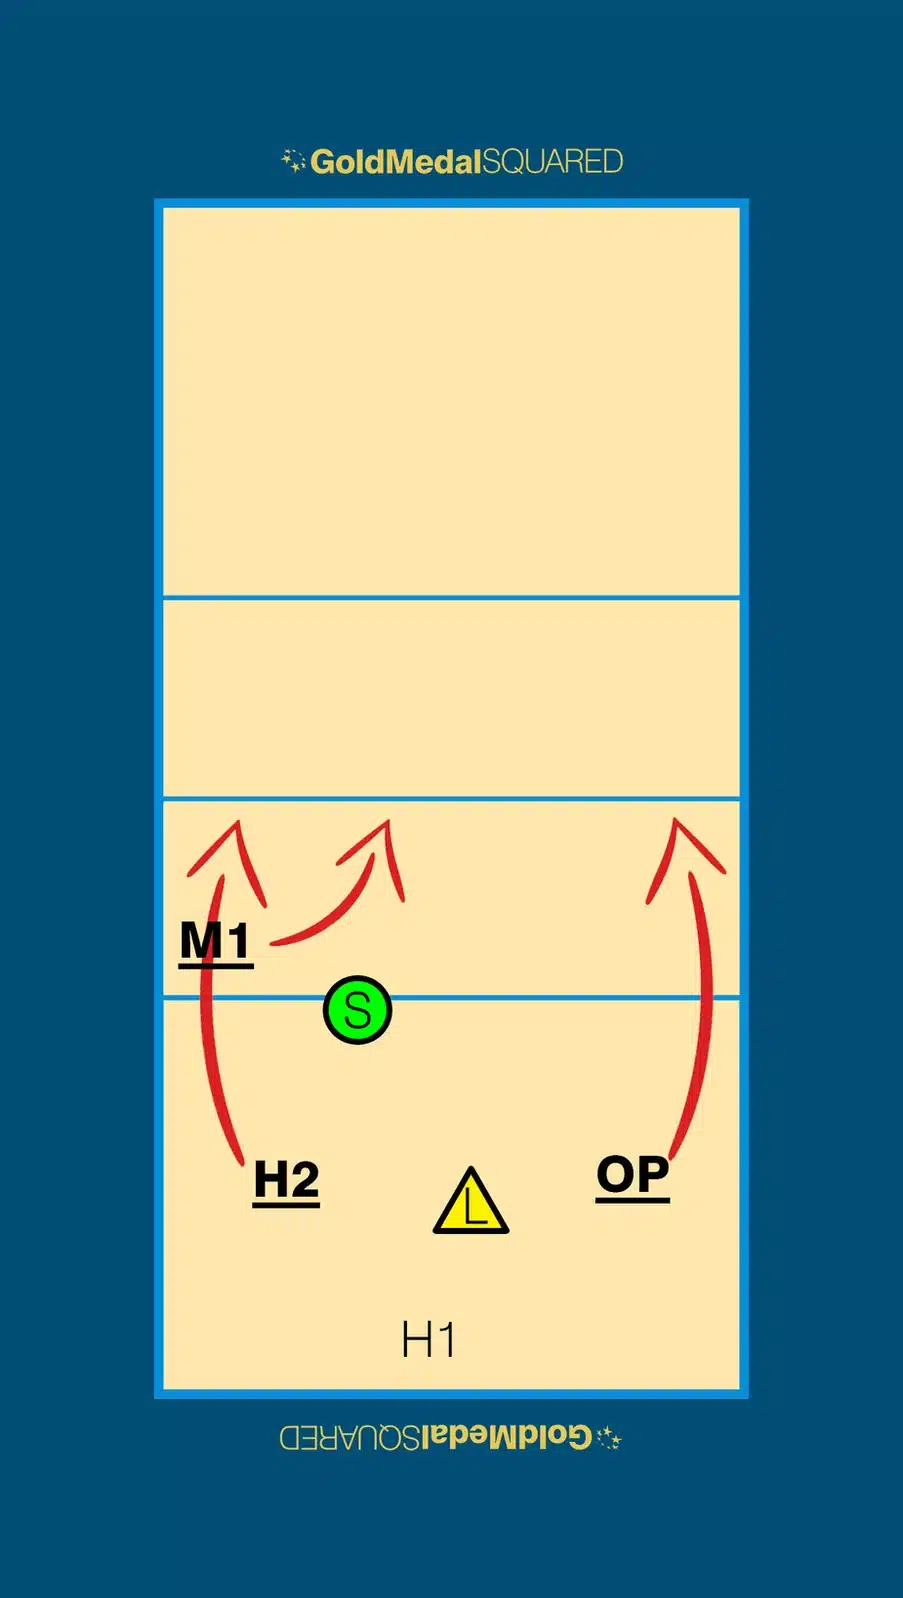
ROTATION 3 – Opposite Passing Option w/out H2 Passing
Player Assignments by Position:
S: Starts in Zone 4 behind the M1
H1: Passes in Zone 5
L: Passes in Zone 6
OP: Passes in Zone 1 and hits Reds
H2: Starts behind the Setter and hits Gos
M1: Starts in Zone 4 and hits Gaps/Quicks
Advantages/Benefits:
- The Libero is passing in the middle of the court.
- The H2 is freed up to focus on attacking.
- If the Opposite is a better passer than the H2, this is a great option to take advantage of.
Disadvantages/Drawbacks:
- The Setter moves a bit further away from the passing target, which means she’ll have an extra bit of distance to cover to get to her spot after the serve.
- The Opposite may become a serving target (counter this by having the Libero cover a little bit more of the court in serve-receive, making it more difficult for opposing teams to serve to the Opposite).
- Make sure the Setter has good enough footwork to avoid interfering with the M1’s and H2’s offensive approaches.
Important Overlap Rules Considerations:
- The Setter must be behind the M1.
- The Setter must be to the left of the H1.
- The M1 must be to the left of the H2. This won’t be a problem if the M1 stands right next to the left sideline when the rally begins. The H2 needs to be a step into the court.
- The Opposite must be in front of the Libero.
ROTATION 3 – Opposite Passing Option w/out H1 Passing
Player Assignments by Position:
S: Starts in Zone 4 near the middle of the 3-meter line
H1: Steps back to the end line and doesn’t pass
L: Passes in Zone 6
OP: Passes in Zone 1 and hits Reds
H2: Passes in Zone 5 and hits Gos
M1: Starts in Zone 4 and hits Gaps/Quicks
Advantages/Benefits:
- The Libero is passing in the middle of the court.
- The Setter moves back a little closer to the passing target.
- If the H2 and the Opposite are both better passers than the H1, this is a great option to take advantage of.
Disadvantages/Drawbacks:
- Both of the pin hitters are passing and hitting as front row attackers. Make sure they both are capable to hit effectively after they pass.
Important Overlap Rules Considerations:
- The Setter must be behind the M1.
- The Setter must be to the left of the H1.
- The H1 must be to the left of the Libero.
- The M1 must be to the left of the H2.
- The Opposite must be in front of the Libero.
Rotation 3 with the H2 Passing in Zone 5 and hitting a go. The OP passes in Zone 1 and hits a red. The M2 hits a gap/quick.
How to Decide?
Of all these options, which is best for your team? Because the first contact of the rally is so critical to your ability to sideout, the easiest way to answer this question is to determine who the three best passers are, and have those three players pass. In other words, have the weakest of the four potential passers not pass.
That being said, there may be a few other things to consider. If it’s more important to have your Libero passing in the middle of the court, you may want to consider one of the options with the Opposite passing, which pushes the Libero to zone 6. Or, if your H2 is not a great attacker after she passes, then you may want to consider the option which takes the H2 out of serve-receive.
You can also make adjustments in this rotation during matches. If your team is struggling to sideout in Rotation 3, or if you’ve given up several points in a row, think about making the adjustment right then to one of the other sideout options available in this rotation. Making this type of change in the middle of a match might help your passers and it might help your hitters. Just be sure to practice these different formation options beforehand so your players are comfortable with your decision.
Earlier Posts in this Series
Later Posts in this Series